Easy Oven Baked Chicken Breast: Your Meal Prep Go-To for Juicy Perfection
Tired of dry, bland chicken breasts that leave you wishing you’d ordered takeout? You’re not alone. For many home cooks, achieving a perfectly juicy and flavorful baked chicken breast feels like a culinary mystery. But what if we told you there’s a simple, foolproof method to transform this lean protein into a succulent meal prep powerhouse or a speedy weeknight dinner staple? Get ready to say goodbye to boring chicken forever.
This guide reveals the secrets to crafting the best oven baked chicken breast – tender, moist, and packed with flavor – with minimal effort. It’s a recipe designed not just for deliciousness, but for ultimate convenience, making it your go-to solution for busy evenings and efficient meal planning. With just a few simple ingredients and less than 30 minutes, you can have a versatile protein ready to elevate any dish.
The Secret to Unbeatable, Juicy Baked Chicken Breast Every Time
The quest for the perfect baked chicken breast often ends in frustration, but a few key techniques can turn failure into consistent success. Forget everything you thought you knew about rubbery chicken; these principles are your ticket to tender, juicy results.
Achieving Even Thickness for Consistent Cooking
One of the most common culprits for dry chicken is uneven cooking. Thicker parts cook slower, while thinner sections dry out waiting for the rest to catch up. The solution? Pound your chicken breasts to an even thickness. Place each breast in a zip-top bag or between two sheets of parchment paper and gently pound with a meat mallet or rolling pin until it's about ¾ to 1 inch thick across. This simple step not only ensures uniform cooking but also helps tenderize the meat, making it incredibly succulent. This consistency is also a game-changer for meal prep, as every piece will cook beautifully and be equally tender.
The Power of High Heat: 425°F is Your Friend
Forget low and slow for chicken breasts; high heat is the hero here. Baking at a scorching 425°F (220°C) allows the exterior of the chicken to cook quickly, sealing in moisture and creating a delicate crust. This rapid cooking prevents the muscle fibers from seizing up and releasing their precious juices. It’s a method that promises a quick, efficient bake without sacrificing an ounce of tenderness. For a deeper dive into this optimal temperature, check out our guide on how to
Bake Chicken Breast at 425°F: Never Dry Again!
Never Overcook: The Thermometer is Non-Negotiable
If there's one golden rule for cooking chicken, it's this: *do not overcook it*. Overcooking is the single most common reason chicken turns out dry and tough. While cook times are helpful guides, the only truly accurate way to know when your chicken is done is by using an instant-read meat thermometer. Chicken breast is safely cooked when it reaches an internal temperature of 165°F (74°C) in the thickest part. Start checking around the minimum suggested cook time. Often, when the chicken registers around 155°F (68°C), it needs just another minute or two. Pull it out promptly – it will continue to cook slightly from residual heat (known as carry-over cooking) as it rests.
The Essential Rest Period
Once your beautifully baked chicken comes out of the oven, resist the urge to slice into it immediately. Allowing the chicken to rest for at least 5 minutes is crucial. During cooking, the muscle fibers contract, pushing the juices towards the center. Resting gives these juices time to redistribute throughout the meat, resulting in a more tender, flavorful, and incredibly juicy bite. Skipping this step means all those wonderful juices will run out onto your cutting board instead of staying locked within the chicken.
Mastering Your Oven Baked Chicken Breast: Step-by-Step Guide
Ready to put these secrets into practice? Here's a straightforward, step-by-step approach to baking the perfect chicken breast every time.
Step 1: Prep Your Chicken for Perfection
Begin by preheating your oven to 425°F (220°C). While the oven heats, retrieve your boneless, skinless chicken breasts. Pat them thoroughly dry with paper towels – this helps achieve better browning and allows the seasonings to adhere properly. As discussed, place each breast between parchment paper or in a sturdy zip-top bag and pound them to an even thickness of about ¾ to 1 inch. This ensures uniform cooking and a more tender result.
Step 2: Crafting Your Flavor Profile
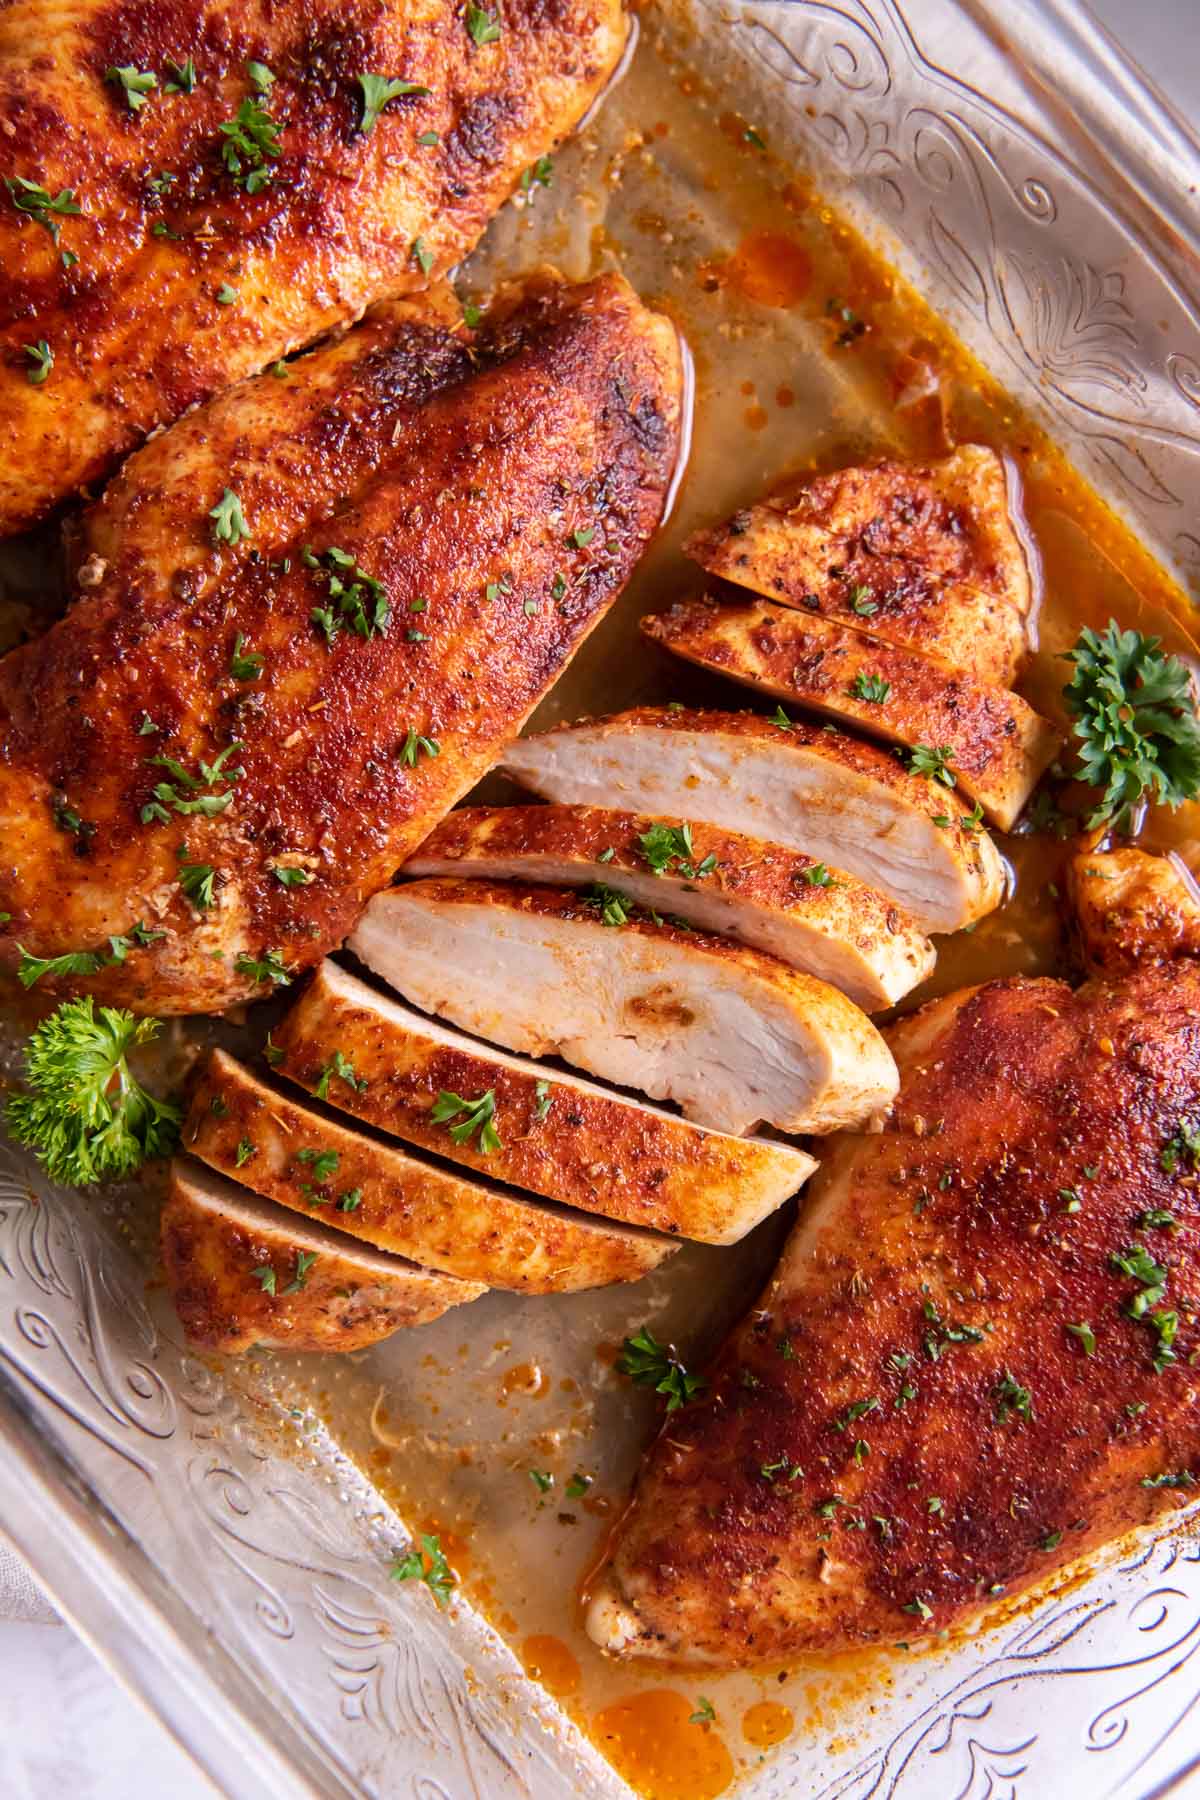
A simple yet effective spice rub is all you need to elevate your chicken. In a small bowl, combine classic pantry staples: 1 teaspoon of paprika, 1 teaspoon of dried oregano, 1 teaspoon of garlic powder, ½ teaspoon of salt, and ¼ teaspoon of black pepper. This blend offers a warm, earthy, and aromatic foundation that complements chicken beautifully.
Next, place your prepared chicken breasts in a baking dish. Drizzle them generously with 1-2 tablespoons of olive oil, then rub the oil over all sides of the chicken. The olive oil not only adds flavor and moisture but also helps the spice rub stick evenly. Finally, sprinkle and rub your seasoning mixture over both sides of the oiled chicken, ensuring every inch is coated for maximum flavor. Feel free to customize this basic rub with a pinch of chili powder for a kick, onion powder for more depth, or even a dash of Italian seasoning for a Mediterranean twist.
Step 3: The Bake
Transfer the seasoned chicken breasts to your preheated oven. The cook time will vary depending on the size and thickness of your chicken breasts, even after pounding. Here’s a general guide for baking at 425°F:
* **Small (5-6 ounce) chicken breasts:** 13-16 minutes
* **Medium (8 ounce) chicken breasts:** 16-19 minutes
* **Large (11-12 ounce) chicken breasts:** 22-26 minutes
Remember, these are starting points. Always rely on an instant-read thermometer for accuracy.
Step 4: Rest and Serve
Once your chicken reaches 165°F (74°C) internal temperature, remove it from the oven. Tent the baking dish loosely with foil and let the chicken rest for a full 5 minutes. This vital step allows the juices to redistribute, guaranteeing a moist and tender result. After resting, slice, dice, or serve your perfectly baked chicken breasts whole.
How Long to Bake Chicken Breasts at 425°F? (Internal Temperature is King)
While general guidelines for baking chicken breasts are helpful, understanding the "why" behind the timing, and more importantly, how to verify doneness, is crucial for consistently perfect results. At a high temperature of 425°F (220°C), boneless, skinless chicken breasts cook relatively quickly, sealing in those precious juices.
* For **small (5-6 ounce)** chicken breasts, expect a cooking time of approximately **13-16 minutes**.
* **Medium (8 ounce)** chicken breasts will typically require **16-19 minutes**.
* **Large (11-12 ounce)** chicken breasts will need the most time, generally between **22-26 minutes**.
However, these times are estimates. Oven calibration can vary, and even slight differences in chicken thickness will impact cooking. The ultimate authority on doneness is an instant-read meat thermometer. Insert it into the thickest part of the chicken, avoiding bone. Your target internal temperature is
165°F (74°C). It’s useful to note that once your chicken reaches around 155°F (68°C), it’s nearing completion and will likely only need another minute or two. Watch it closely at this stage, as chicken can quickly go from perfectly cooked to overcooked and dry. Trust your thermometer, not just the clock, for truly juicy results.
Beyond the Basics: Tips for Your Meal Prep Baked Chicken Breast
The beauty of this easy oven baked chicken breast recipe extends far beyond a single meal. Its simplicity, versatility, and speed make it an absolute champion for meal preparation.
Batch Cooking for the Week Ahead
This recipe is incredibly scalable. Don't just make one or two breasts; consider baking a larger batch to last you through several days. Double or even triple the recipe, using a larger baking dish or multiple dishes. Having pre-cooked, perfectly seasoned chicken ready in your fridge dramatically cuts down on weekday cooking time, making healthy eating effortless.
Endless Versatility for Meal Prep
Once cooked, your juicy baked chicken breast is a blank canvas for countless meals.
* **Salads:** Slice or dice and add to your favorite green salad for a protein-packed lunch.
* **Sandwiches & Wraps:** Shred or slice for a gourmet sandwich filling.
* **Pasta Dishes:** Toss with hot pasta, your favorite sauce, and some fresh vegetables.
* **Stir-fries & Rice Bowls:** Add to a quick stir-fry or as a topping for grain bowls with roasted veggies.
* **Quesadillas & Tacos:** Chop and mix with cheese for quick quesadillas or flavorful taco filling.
The possibilities are truly limitless, preventing meal prep fatigue and keeping your healthy eating exciting. If you’re looking for more quick flavor ideas, check out our
Secret to Juicy Baked Chicken Breast: 30-Minute Recipe.
Smart Storage for Freshness
Proper storage is key to extending the life of your meal-prepped chicken. Once cooled, store the chicken breasts in airtight containers in the refrigerator for up to 3-4 days. For longer storage, cooked chicken can be frozen for up to 3 months. To freeze, slice or dice the chicken, then spread it in a single layer on a baking sheet to flash freeze. Once frozen, transfer to a freezer-safe bag, removing as much air as possible. This prevents clumping and allows you to grab just the portion you need.
Pairing Perfection
This versatile baked chicken breast pairs beautifully with almost any side dish. Consider serving it with:
* Roasted vegetables (broccoli, asparagus, bell peppers)
* Fluffy quinoa or brown rice
* Creamy mashed potatoes or sweet potato fries
* A vibrant side salad with a light vinaigrette
* Crusty sliced bread for soaking up any extra juices
By incorporating these meal prep tips, your easy oven baked chicken breast won't just be a delicious meal; it'll be a strategic ally in maintaining a healthy, convenient, and flavorful diet throughout your busy week.
Your New Go-To Recipe for Effortless, Delicious Meals
Say goodbye to culinary guesswork and hello to consistently perfect, juicy, and flavorful baked chicken breast. This recipe isn't just about cooking chicken; it's about transforming a basic ingredient into a versatile meal prep staple that saves you time and elevates your dining experience. With the simple techniques of even thickness, high-heat baking, precise temperature monitoring, and that all-important rest, you're now equipped to create chicken breasts that are anything but boring. Embrace this easy oven baked chicken breast as your new meal prep go-to and discover a world of quick, healthy, and delicious possibilities.