Bake Chicken Breast at 425°F: Never Dry Again!
Are you tired of dry, bland chicken breasts that leave you wishing you’d ordered takeout? You're not alone. For too long, the humble chicken breast has suffered a reputation for being notoriously difficult to cook perfectly – often emerging from the oven tough and devoid of moisture. But what if we told you there’s a simple, high-heat method that guarantees a consistently juicy, flavorful baked chicken breast every single time? Get ready to transform your weeknight dinners and master the art of the perfect oven-baked chicken at 425°F.
This isn't just another recipe; it's a game-changer. By harnessing the power of a hot oven, we're going to demystify the process, turning what was once a culinary challenge into a quick, effortless, and utterly delicious staple. Say goodbye to guesswork and hello to tender, succulent chicken breasts that will make you wonder why you ever settled for less.
The Secret to Succulent Baked Chicken Breast: Why 425°F Works Wonders
The key to achieving incredibly juicy baked chicken breast lies in one crucial factor: temperature. While lower temperatures might seem safer, they can actually prolong cooking time, giving the chicken more opportunity to dry out. Our magic number, 425°F, provides a high-heat environment that works synergistically to lock in moisture and develop exquisite flavor.
Here’s why baking at 425°F is a revelation:
- Rapid Cooking, Minimal Moisture Loss: High heat cooks the chicken quickly and efficiently. This minimizes the time the muscle fibers are exposed to heat, reducing the amount of moisture that's squeezed out. Think of it like a quick, intense burst that gets the job done before dryness can set in.
- The Maillard Reaction: This scientific marvel is what gives food its delicious brown crust and complex flavors. A hotter oven promotes the Maillard reaction on the surface of your chicken, creating a beautiful golden-brown exterior that is rich in savory notes, contrasting beautifully with the tender interior. Lower temperatures often result in a pale, less appealing finish.
- Sealing in Juices: While not a true "seal," the rapid cooking at 425°F helps to quickly set the exterior of the chicken, forming a barrier that helps to retain the internal juices more effectively than a slow, low bake.
By embracing this higher temperature, you’re not just cooking; you’re strategically optimizing for both speed and unparalleled juiciness. It's the cornerstone of mastering truly delicious baked chicken breast.
Mastering the Prep: Foundation for Flavor and Juiciness
While the oven temperature is critical, the journey to a perfect baked chicken breast begins long before it hits the heat. Thoughtful preparation ensures even cooking, maximum flavor absorption, and an overall superior dining experience. This foundational work takes only minutes but makes all the difference.
The Art of Pounding for Even Thickness and Tenderness
One of the most overlooked yet vital steps is pounding your chicken breasts to an even thickness. Chicken breasts often come thicker on one end and thinner on the other, leading to uneven cooking – where the thin parts dry out while the thick parts are still cooking through. To rectify this:
- Place each boneless, skinless chicken breast in a zip-top bag or between two sheets of parchment paper.
- Using a meat mallet, rolling pin, or even the bottom of a heavy skillet, gently but firmly pound the chicken until it reaches a uniform thickness, ideally around ¾ to 1 inch.
Beyond ensuring even cooking, pounding also tenderizes the meat by breaking down some of the muscle fibers, resulting in a more pleasant, less chewy texture.
Essential Seasoning Blend: Your Flavor Canvas
A simple yet effective spice rub elevates your chicken from bland to brilliant. The beauty of this step is its versatility; while we'll start with a classic, feel free to customize it to your taste. For a universally appealing flavor profile that complements almost any meal, consider this blend:
- 1 teaspoon paprika (for color and mild sweetness)
- 1 teaspoon dried oregano (for an earthy, aromatic touch)
- 1 teaspoon garlic powder (a savory staple)
- ½ teaspoon salt (essential for flavor enhancement)
- ¼ teaspoon black pepper (for a hint of spice)
Mix these spices in a small bowl. This blend penetrates the meat, creating a delicious crust and infusing every bite with savory goodness.
The Olive Oil Advantage: Moisture and Browning
Before seasoning, a generous drizzle of olive oil is non-negotiable. Pat your chicken breasts dry with paper towels – this helps the oil and spices adhere better. Then, rub about a tablespoon of olive oil over all sides of each chicken breast. The olive oil serves multiple purposes:
- Moisture: It adds an extra layer of moisture, helping to keep the chicken succulent during the high-heat bake.
- Flavor: Good quality olive oil contributes its own subtle, fruity notes.
- Browning: It acts as a fantastic conduit for the Maillard reaction, promoting that desirable golden-brown crust.
- Adhesion: It helps the spice rub stick evenly to the chicken, ensuring uniform flavor distribution.
Once oiled, thoroughly rub your seasoning mixture over both sides of the chicken, ensuring every surface is coated. Place the seasoned chicken breasts in a baking dish, ready for their transformation.
Your Guide to Perfect Baking Times at 425°F
Understanding optimal baking times is crucial, but it’s more art than science, influenced heavily by the size and thickness of your individual chicken breasts. The goal is to cook them through without a moment of overcooking, which is the nemesis of juicy chicken. At 425°F, chicken cooks surprisingly fast, making precise timing and accurate temperature monitoring paramount.
Here’s a general guide for boneless, skinless baked chicken breast at 425°F:
- Small (5-6 ounces): Approximately 13-16 minutes
- Medium (8 ounces): Approximately 16-19 minutes
- Large (11-12 ounces): Approximately 22-26 minutes
These are starting points. Always remember that ovens can vary, and your chicken's exact thickness (even after pounding) will impact the total time. The most reliable tool in your kitchen arsenal for this job is an instant-read meat thermometer.
Internal Temperature is King: Don't Guess, Measure!
Guessing if chicken is done is a recipe for either dry poultry or undercooked risk. The U.S. Department of Agriculture (USDA) recommends cooking all poultry to an internal temperature of 165°F (74°C). To measure:
- Insert an instant-read thermometer into the thickest part of the chicken breast, making sure it doesn't touch any bone.
- When the thermometer registers 165°F, your chicken is perfectly cooked.
A helpful tip: chicken continues to cook for a few minutes after being removed from the oven (this is called carryover cooking). Many chefs recommend pulling the chicken when it hits around 155-160°F, as it will likely reach 165°F during the resting period. Watch it closely, as it can go from perfect to overcooked in a matter of a minute or two.
Beyond the Oven: Crucial Post-Bake Steps for Ultimate Juiciness
You’ve meticulously prepped, perfectly seasoned, and expertly baked your chicken. But the journey to ultimate juiciness isn’t quite over yet. There’s one final, non-negotiable step that often gets skipped, much to the detriment of the final dish: resting.
The Power of the Rest: Let the Juices Redistribute
Once your baked chicken breast reaches its ideal internal temperature of 165°F, resist the urge to slice into it immediately. Transfer the chicken breasts to a cutting board and let them rest, uncovered, for at least 5-10 minutes. This resting period is critical:
- Redistribution of Juices: When meat cooks, the muscle fibers contract, pushing the juices towards the center. If you cut into it too soon, those precious juices will pour out onto your board, leaving your chicken dry and less flavorful.
- Reabsorption: Resting allows the muscle fibers to relax and reabsorb those juices, ensuring that every slice is moist and tender from edge to center.
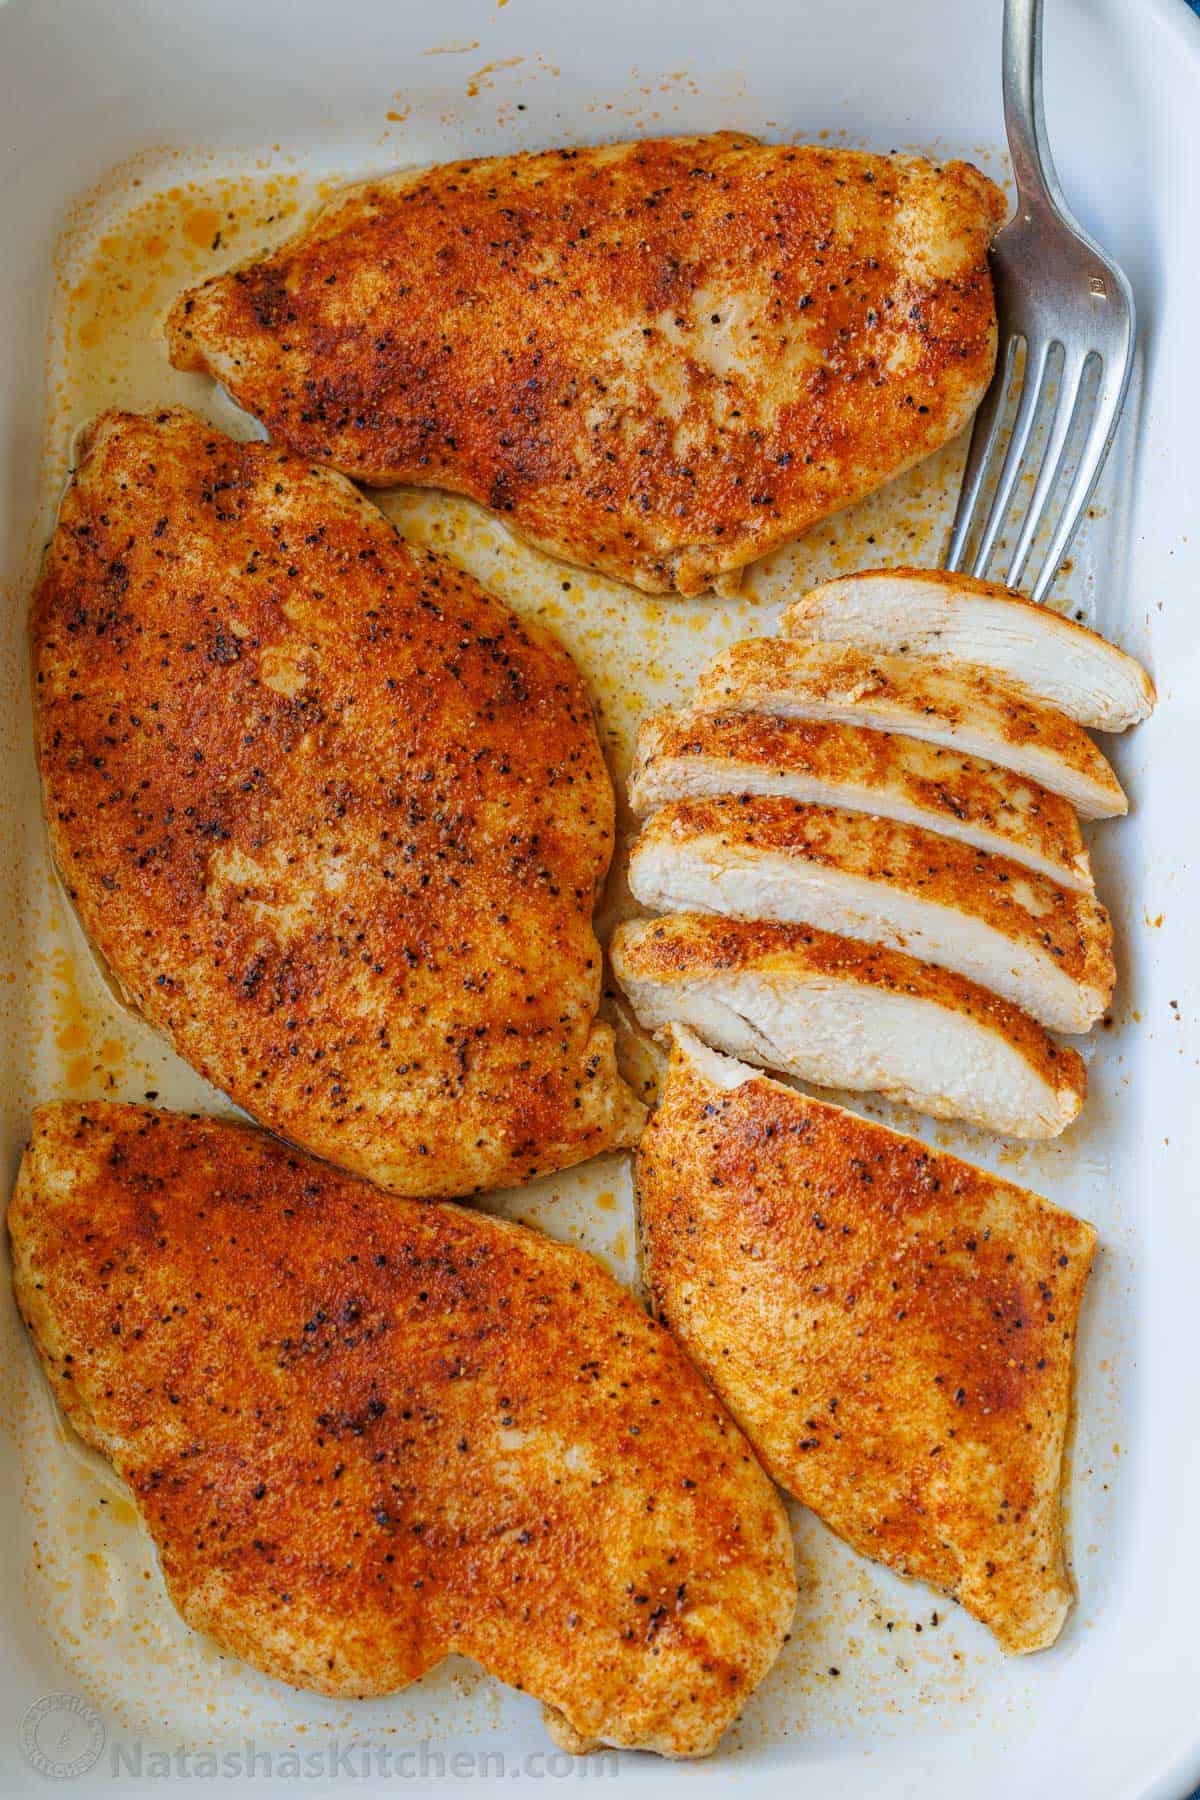
This simple act of patience ensures that all your hard work pays off, delivering a truly succulent baked chicken breast experience. After resting, slice against the grain for maximum tenderness and serve immediately.
Your Go-To for Quick Meals and Meal Prep
One of the greatest advantages of mastering this 425°F baked chicken breast method is its incredible versatility and convenience. It's the perfect solution for busy weeknights when you need a healthy, satisfying meal on the table in under 30 minutes from start to finish. Pair it with roasted vegetables, a simple salad, or some fluffy quinoa for a complete dinner.
Moreover, this recipe is an absolute dream for meal prepping. Cook a larger batch at the beginning of the week, and you'll have perfectly cooked, flavorful chicken ready to incorporate into salads, sandwiches, wraps, or stir-fries for days to come. It’s an easy oven baked chicken breast that truly becomes your meal prep go-to, saving you time and ensuring healthy eating throughout your busy schedule.
So, there you have it – the definitive guide to baking chicken breast at 425°F, ensuring it’s never dry again. By understanding the science of high heat, paying attention to simple prep steps, using a thermometer, and allowing for a crucial rest, you can consistently achieve incredibly juicy, flavorful results. Forget boring chicken; embrace this method and elevate your home cooking to new, delicious heights. Your taste buds will thank you!
